Can You Pour Cement in Cold Weather? Winter Concrete Guide
Unlike water and cement, construction projects and frigid temperatures don’t mix. Although cooler months don’t offer ideal conditions for pouring concrete, construction and repair projects don’t stop just because temperatures drop.
Cold weather can present multiple challenges for contractors, leading many to assume concrete work isn’t feasible in winter. However, with the right planning, materials, and techniques, it’s still possible to pour and cure concrete successfully. That’s what we’re discussing today.
Though this information is insightful for property owners in need of concrete work, it’s best to leave cold-weather jobs to the professionals. Cold-weather pours can be tricky, and improper handling can lead to cracking, uneven surfaces, or long-term damage.
If you’re planning a concrete project in Southern California, contact the experts at TMC Engineering. Our team has the experience, equipment, and materials to ensure every pour is done right—from start to cure.
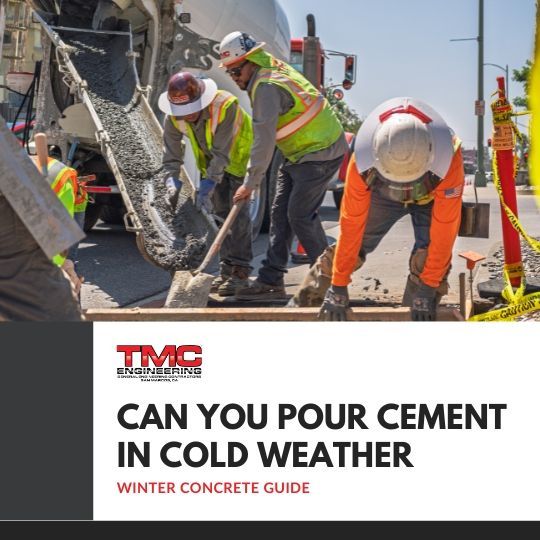
Can You Pour Cement in Cold Weather? Winter Concrete Guide
In this guide, we will explore the feasibility and best practices of pouring concrete in cold weather conditions. Additionally, we’ll discuss the ideal temperatures for concrete work, and explain the necessary steps for achieving a durable, long-lasting finish.
What Is the Best Temperature for Pouring Concrete?
50-70°F is the ideal temperature for pouring concrete. At this temperature, the concrete is easy to work with, and curing is generally successful with professional application. This is why many professionals consider “paving season” to be late spring to early fall.
Will Cement Cure in Cold Weather?
Cement will cure as long as the temperature is above 32°F. However, it starts to slow significantly below 40°F. Pouring between 32 and 40°F will require additional steps and specialized concrete. Moreover, pouring below 32°F is not advised and may result in an unsatisfactory outcome.
How Long Does Cement Take to Cure in Cold Weather?
In cold weather, concrete takes longer to reach its initial set, which is when it hardens enough to hold its shape. This process generally takes between 2 and 5 days, depending on the temperature and protection methods used.
However, the full concrete curing process (when the surface develops its complete strength and durability) can take 35 to 45 days in cold conditions. This is significantly longer than the standard 28 days required to cure in mild weather.
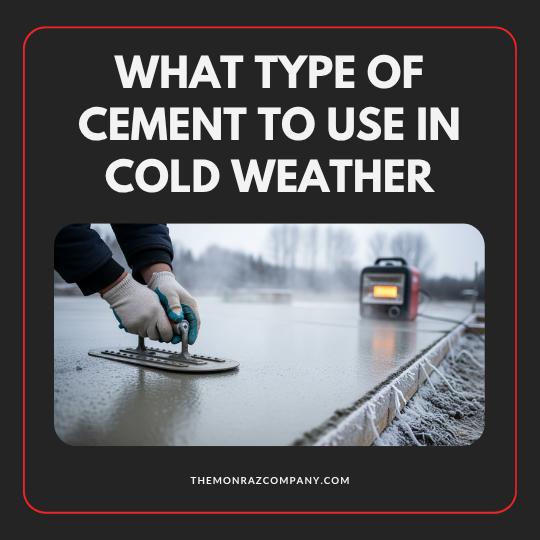
What Type of Cement to Use in Cold Weather
Type III Cement (High-Early-Strength Cement)
Type III cement is a version of Portland cement that’s formulated to gain strength much faster than other concrete types. It has the same ingredients as standard cement, but manufacturers use different ratios and finer particles.
This one difference makes Type III cement setting times three times faster than Type 1. It also generates significantly more heat early in the process, which helps prevent freezing.
Type I/II Cement with Accelerators
Type I and Type II cements can be used in cold weather when combined with accelerators. These are standard cement types.
However, when contractors include additives like
calcium chloride, calcium
nitrate, or other accelerators, the mix generates heat more quickly and shortens the setting time. This allows standard cement to perform similarly to Type III formulations, often making it a more cost-effective solution.
For additional information about accelerators, visit our post, “When Can You
Pour Concrete?”
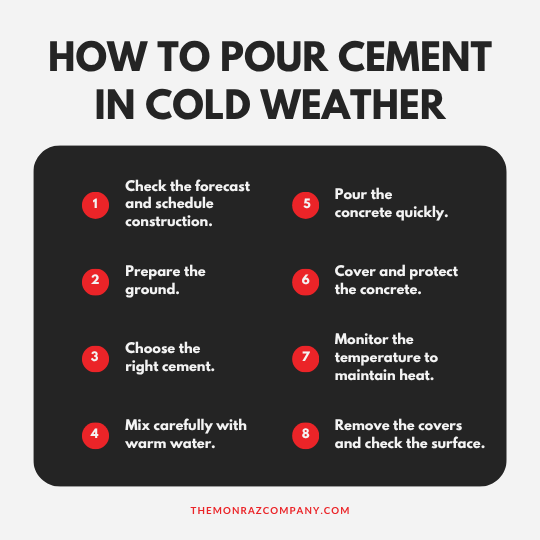
How to Pour Cement in Cold Weather
Step One: Check the forecast and schedule construction.
Before scheduling any concrete work, check the forecast to find the optimal weather window for construction. While it’s possible to pour cement in cold weather, you’ll have better results when air temperatures stay above 40°F.
Pouring at lower temperatures can lead to several issues. Water in the mix may freeze, for example, causing cracking, scaling, or flaking due to reduced compressive strength. Even if these problems don’t appear right away, cold temperatures can significantly slow or halt the curing process.
Nonetheless, concrete can be poured in cold weather, provided that appropriate precautions are taken to ensure proper curing and strength. The lower the temperature, the more protection and planning you’ll need. If you’re pouring below 40°F, ensure you have the necessary materials and equipment to support successful curing.
As your scheduled date approaches, monitor the forecast closely and consider rescheduling if conditions aren’t favorable. If meteorologists expect temperatures to drop below 32°F within 24 hours of your project, it’s best to select a later date to ensure proper curing and avoid damage.
Step Two: Prepare the ground.
Start by properly preparing the ground before you pour any concrete. Use insulated blankets, heated sand, or ground heaters to thaw any frozen soil. As the ground warms, crews should remove all snow, ice, and standing water to prevent weak spots in the slab.
Once thawed, compact and level the base as you normally would. Afterwards, lay down a vapor barrier or a layer of gravel to prevent moisture from seeping up into the concrete. If temperatures are especially frigid, reheat the ground again just before pouring to maintain warmth and help ensure proper bonding and curing.
Step Three: Choose the right cement.
Since setting and curing times are the biggest challenges in cold-weather construction, it’s important to compensate by using the right type of cement.
Low temperatures call for a fast-setting, high-early-strength mix. These solutions generate necessary internal heat and reach safe strength before freezing can occur. As mentioned earlier, this can be achieved with Type III cement or by using Type I or II cement with accelerators.
Step Four: Mix carefully with warm water.
In addition to warming the ground, it’s wise to heat the materials as well. Cold water in a concrete mix can make it stiff and difficult to place. Using warm water helps the cement generate internal heat and initiates the chemical reaction of hydration. In some cases, contractors may also consider increasing the cement in the mix. This supports proper setting and curing, which in turn lowers the risk of freezing.
On professional jobs, contractors often preheat the water in insulated tanks and maintain its temperature through continuous heating systems. This ensures the mix stays at a consistent, optimal temperature throughout the pour. For DIY projects, similar principles can be applied on a smaller scale. Preheat water in a large pot or hot water heater, use insulated containers to retain heat, and keep the mix covered during placement to maintain warmth.
Though warm water is helpful, do not use hot water. Scalding temperatures can accelerate setting and curing so quickly that smoothing, leveling, and finishing the surface becomes impossible. This will inevitably lead to cracks, scaling, and/or shrinkage. It’s best to work with a professional to achieve a precise, consistent water temperature that allows for easy placement and proper curing.
Step Five: Pour the concrete quickly.
Concrete loses heat and workability quickly, so it’s essential to pour it as soon as possible. Place the concrete immediately after mixing, once you’ve confirmed it has reached the proper temperature. Prompt placement helps ensure a uniform finish and reduces the risk of weak spots, unevenness, cracking, or color variation. It also allows the concrete to develop early strength safely.
To make this possible,
contractors use
concrete equipment such as pumps, chutes, or insulated wheelbarrows to move the mix efficiently from the truck to the forms. The concrete is typically poured in sections or layers, with each portion compacted and leveled immediately to prevent air pockets. This careful placement and compaction help ensure consistent strength throughout the slab.
Step Six: Cover and protect the concrete.
One of the most critical steps in cold-weather concrete work is protecting the curing process by covering the finished surface. Concrete does not reach a safe durability level until it achieves roughly 500 psi, which typically takes 24-48 hours. If the concrete freezes during this initial set, it can be ruined, requiring removal and replacement of the newly poured slab.
To help the surface maintain a safe temperature, use thick insulated tarps, plastic sheeting, heated tents, insulated edge protection, and windbreaks. These measures trap heat, prevent freezing, and allow the concrete to continue hydrating. Ultimately, this will improve both setting and curing times, thereby increasing the likelihood of a favorable final product.
Step Seven: Monitor the temperature to maintain heat.
For the first 48 hours, keep the concrete temperature between 50-70°F to ensure proper curing and prevent freezing. Once the concrete reaches approximately 500 psi, it is less vulnerable. After that, you can allow it to gradually reach ambient temperature.
If you are using heaters or heated enclosures, remove them gradually in stages instead of all at once. This helps prevent thermal shock, which can cause cracking. Continue to monitor the temperature under blankets or covers until the concrete has gained sufficient strength.
Step Eight: Remove the covers and check the surface.
After 24-48 hours (or once the concrete reaches approximately 500 psi), remove all covers and inspect the surface. If the pour was successful, the concrete should be level and free of blemishes. However, there may be signs that cold-weather precautions were not effective. Here’s how to properly inspect the surface:
- Visual Test: Look for cracks, scaling, or flaking on the surface. Check for uneven color, especially around edges and corners.
- Surface Hardness Test: Gently press the surface with your thumb or a small tool. Soft or powdery spots indicate incomplete curing.
- Light Tapping: Tap with a rubber mallet. A solid, uniform sound indicates good bonding; hollow or uneven sounds may signal voids or frozen areas.
- Moisture Observation: Check if the surface is drying too quickly. Rapid drying can lead to shrinkage cracks; a wet but firm surface shows proper curing.
Cold-weather concrete pouring isn’t ideal, but it is possible.
Cold-weather concrete work requires careful planning, precise execution, and expert knowledge to ensure a durable, high-quality result. Every step—from selecting the appropriate cement to protecting the concrete during curing—can impact the final outcome. Read this guide where we discuss the best weather to pour concrete and ensure the best results.
At TMC Engineering, our Southern California team brings the experience, equipment, and technical expertise needed to manage concrete projects successfully. Even under challenging winter conditions, we produce reliable results and peace of mind. So for your next project,
contact TMC Engineering, the professionals who understand the nuances of cold-weather concrete work.
For more information on executing concrete work in difficult conditions, read these guides next: